Posted on

15 (& a half) Classic Analogue Synth Reissues

classic analogue synth reissues fat as funk mastering

We all love a classic Analogue Synthesizer. The warmth, the rich tones, even the circuit noise all add a certain loveliness that a software synth cannot match. The question of soft synth vs hard synth has a clear winner – one that weighs several kilos and comes in a box!

Reissued synths are a way of getting these amazing authentic sounds and the joy of owning a hardware classic, for a fraction of the price of the original. They are usually modernised with new features and connectivity, and sometimes notable negative points of the original have been improved. For example some early synths were notoriously difficult to tune (and stay in tune!) so by correcting these aspects, it can only be considered an improvement in real terms.

For the heretics (and value-hunters) among us I have also included a few cheaper unofficial Behringer clones of synth classics which are great in their own right, and deliver the goods for even less money. To be fair, Behringer have put a lot of love in to these reissues, boasting all-analogue signal chain, and circuit components that are as close to the originals as possible. I wouldn’t use Behringer products in my mastering chain, but their synths are fantastic, and in the cost of living crisis, it makes total sense to explore going “off-brand” in all facets of life.

If you are wondering “which synth should I buy?” here’s a quick guide to 15.5 (you’ll see why it’s 15 & a half later) of the best classic synth reissues, and a few controller keyboard recommendations at the end. Enjoy!

This article will be updated every so often when I see something else that’s groovy, so please bookmark & check back.

1) Roland JX-8p >>> JX-08

Image

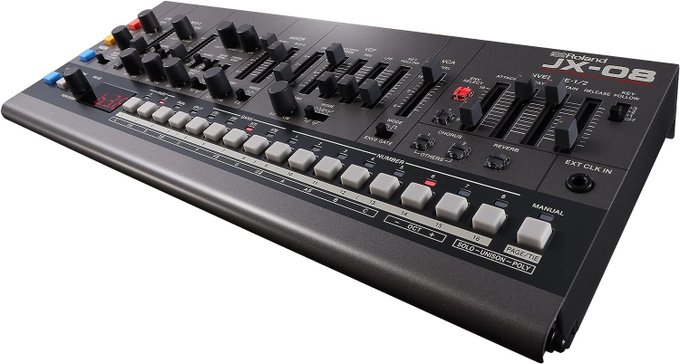
Modern Reissue of the Legendary Roland JX-8P from 1985 with New Effects, Polyphonic Sequencer, and More. I had a hardware JX3-p, its predecessor for around 20 years and it was incredible. The JX8-p is considered an upgrade, and this reissue is a beauty!

Price on Amazon: https://amzn.to/44Pl5Sg

2) Roland TB-303 >>> TB-03 / TD-3-BK

The Roland TB-303 (1981) is one of the most legendary in the world of electronic music. The reissue (TB-03) is a compact, affordable, and modernized version that retains the original’s unique sound. Aciiiid!

Price on Amazon: https://amzn.to/468zkCw

Behringer also make a clone of the 303 for an insanely low price, the TD-3-BK at Just over £100. Bear in mind an original 303 will set you back several thousand (IF you can find one), and just the manual alone sells for several hundred, this Behringer clone is an incredible deal.

Price on Amazon: https://amzn.to/3LwpuTn

Software alternatives

There are a load of software 303 versions, often with extra features. 2 of the best ones are:

The ACID V by Arturia & the Phocyon 2 by D16


3) Roland TR-606 >>> TR-06 / RD-6-SR

Image

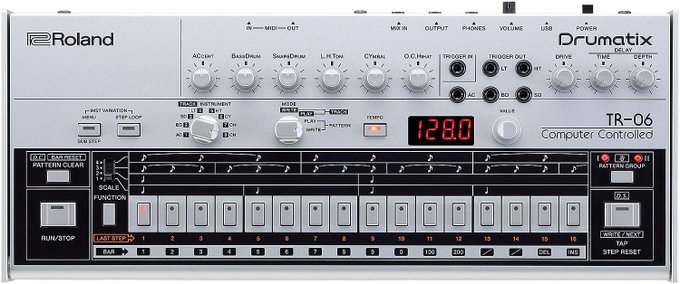
The TR-606 (1981) was designed to be paired with the 303, so a lone singer could have their own bassline and drums without having to organise a band. Then a swarm of electronic artists had different ideas, and music has never been the same again… The TR-06 reissue captures the chunky vibe of the original and adds a wealth Modern Upgrades

Price on Amazon: https://amzn.to/468I7o6

Yes, Behringer have their own all-analogue clone of this too. Yes, it’s an incredible deal.

Price on Amazon: https://amzn.to/48pIH30

Software

The Nithonat by D16 is a fantastic 606 VST

4) Roland TR-808 >>> TR-08 / RD-8

Image

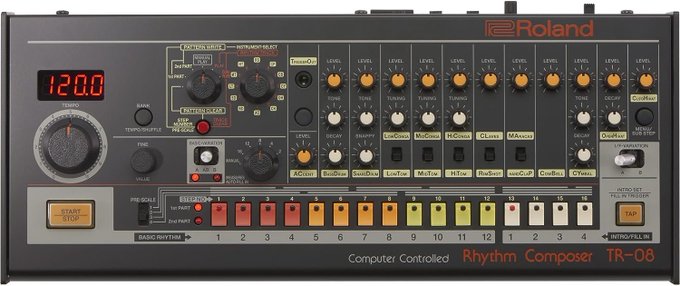
The Roland TR-808 (1980) is the most famous drum machine ever made. The backbone of House music and Hip-Hop, with heavy use across most other electronic genres too, it remains an essential (and incredibly expensive) bit of kit. The reissued TR-08 is a compact, affordable, and modernized version that retains the original’s unique sound.

Price on Amazon: https://amzn.to/3sNn4cj

The RD-8 Behringer clone also has an all analogue signal path, and is almost half-price again. They are shameless, yes, but also offer a great opportunity to producers who want the real analogue feel without spending too much dosh. 11 individual analogue outputs allows you to record or process your drums in multitrack.

Price on Amazon: https://amzn.to/3t81nUr

Software

The Nepheton by D16 is a high-end 808 VST with extra features.

5) Roland TR-909 >>> RD-9

Similar to the 808, but with harder sounds, the 909 grew to become the backbone for Techno and Industrial music, but features in almost all electronic genres too. This all-analogue clone is fat and chunky, with 10 individual outputs and reasonably priced.

Price on Amazon: https://amzn.to/48kkISF

Software

The Drumazon 2 by D16 909 simulator completes the holy trinity of classic drum machine VST instruments.

6) Roland SH-101 >>> SH-01A

Image

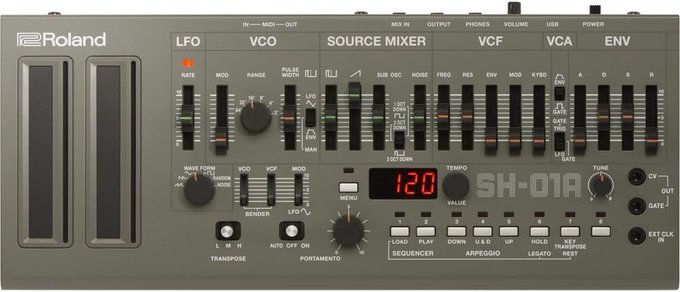
The Roland SH-101 (1982) is a classic 80s monosynth which is capable of some truly savage tones. There’s just something about it which screams! The reissue (SH-01A) is compact, affordable, and has some new features.

Price on Amazon: https://amzn.to/44Xdr8e

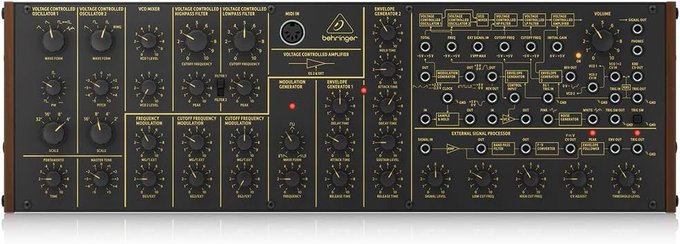
7) Moog Minimoog >>> Model D

Image

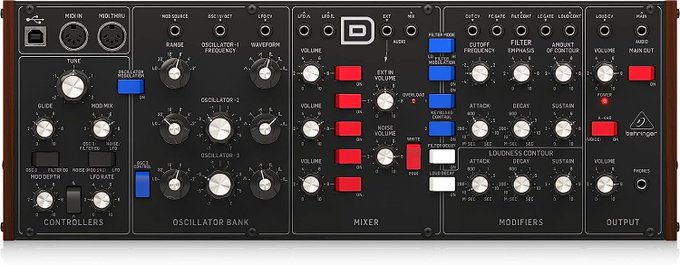
The Moog Minimoog (1970) is one of the most famous synths ever made, and for good reason. A true icon, the originals are incredibly expensive and rare, and mere mortals like us are unlikely to ever even touch one. The cloned Behringer Model D is pretty darn-tootin’ at a fraction of the price of an original.

Price on Amazon: https://amzn.to/44Ul1R6

Software

The Moog Minimoog VST by Universal Audio is the leading software version.

7.5) Moog Minimoog (again) >>> Model D

Image

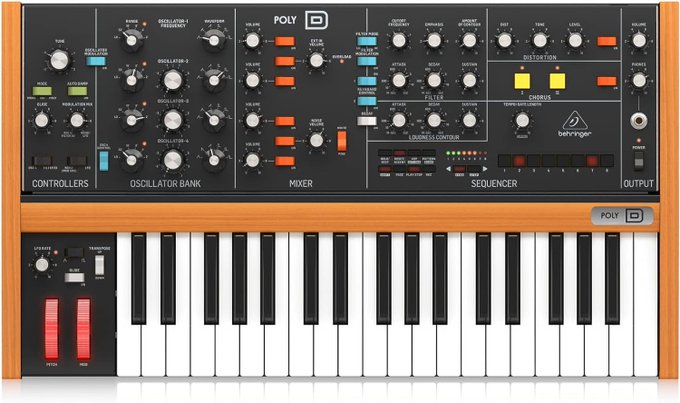
Here’s why the article is call 15 & a half synth reissues… there is also a polyphonic version of the Minimoog Model D which is also made by Behringer: The Poly D. It’s actually technically paraphonic, which can lead to new and interesting tricks by tinkering with the oscillators. Both these Behringer Moog copies caused controversy, with hardcore synth purists getting upset at their unofficial nature. But if you can look past that, they’re awesome in their own right and an affordable way to get a very similar analogue sound to the original.

Price on Amazon: https://amzn.to/3RphvLn

8) Prophet-5 >>> Pro-1

A monophonic version of the immensely fat Prophet-5. The Behringer Pro-1 is a great-value clone if you’re looking for a synth like Prophet 5 which recreates the original circuitry and sound.

Price on Amazon: https://amzn.to/3LpXBfG

Software

The Prophet 5 V by Arturia is a fantastic VST option


9) Novation BassStation >>> BassStation 2

Image

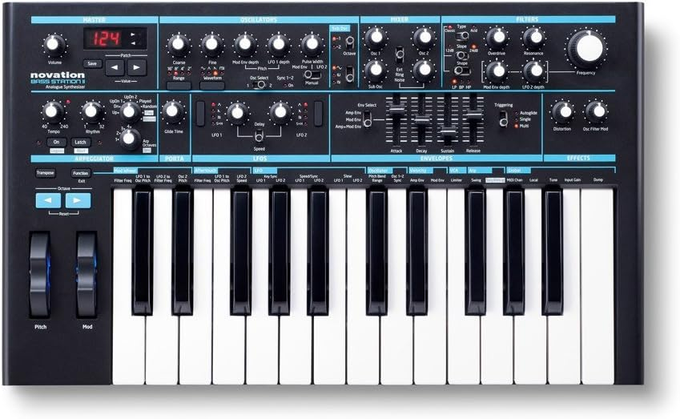
The original (1993) Should really be called the “sound station” due to its flexibility. Earth shattering synth bass, yes! But also lush soundscapes. I had one for many years, and it was a joy to play. The BassStation 2 has been around for a while, and the latest edition has USB and a few new features. Highly recommended.

Price on Amazon: https://amzn.to/48k4SXY

10) Roland Juno-60 >>> JU-06A

Image

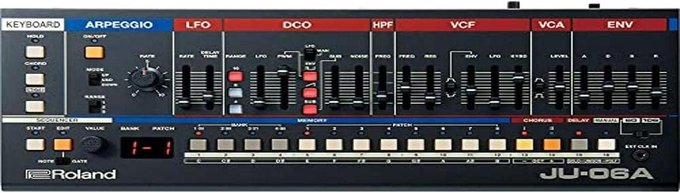
The Roland Juno-60 (1982) is a classic polyphonic synth. There was one at my college, and I spent as many lunchtimes as I could cranking it up and stressing the PA (and anyone in the surrounding area) with those immense filters. The reissue (JU-06A) is a compact, affordable, and modernized version that retains the original’s unique sound. WANT!

Price on Amazon: https://amzn.to/48j35T9

Software

The Model 84 by Softube is a lovely Juno emulation

11) Roland JD-800 >>> JD-08

Image

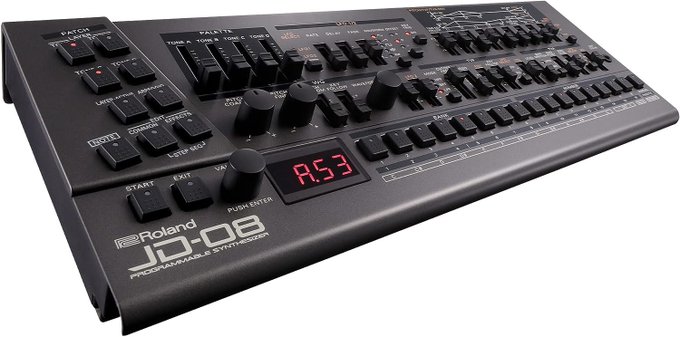
The Legendary ROLAND JD-800 (1991) is a vintage icon. The stunning reissued JD-08 has New Effects, Polyphonic Sequencer, and More

Price on Amazon: https://amzn.to/3Rjy0c1

12) Roland Juno 60 AND Juno 106! >>> Juno-X

Image

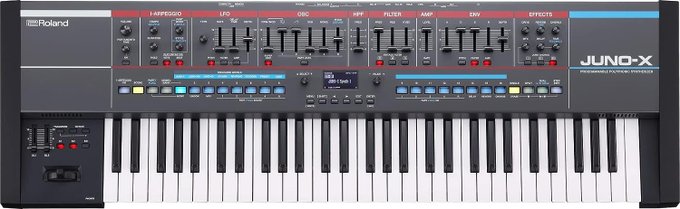
Not a straight “reissue” as such, but worthy of inclusion as the best bits of both these rare legends are combined in a monstrous reissued hybrid synth. The ROLAND Juno-X. Incredible.

Price on Amazon: https://amzn.to/44YSLga

13) Korg MS-20 >>> MS-20 Mini / K-2

This is a legendary synth (1978), and for good reason. Semi-modular and with a wicked filter. It’s been reissued twice – the Official Korg MS-20 Mini was overseen by the original team and is a faithful recreation – the only difference is it’s 86% of the size. I have one of these built in to my desk I love it so much!

Behringer have angered the synth Gods again with a much cheaper clone which is sick too. Heretics can pick up an extremely close version for about half the price.

Image

Behringer K-2 version Price on Amazon: https://amzn.to/44PpmVO

Software

There’s an official software Korg MS-20 VST

Or there’s a bundle of the full Korg collection!

14) Arp Oddysey >>> The Octave CAT >>> CAT

Image

In the spirit of “generational reappropriation” shall we call it, the original Octave CAT was a copy of the ARP Odyssey – a truly groundbreaking synth from the 70’s. Now Behringer have copied the Octave CAT, with their own CAT.

Price on Amazon: https://amzn.to/48kPkDq

Software

Cherry Audio make The Octave CAT in VST form

15) WASP >>> WASP Deluxe

Finishing off on a legend. The WASP. This innovative and quirky synth quickly became ingrained into synth lore. This reissue has a wealth of modern features but keeps to the spirit of the original.

Price on Amazon: https://amzn.to/48nArAd

Need A Controller Keyboard With That?

Some of these synths don’t have the keyboard attached and need a separate controller keyboard to actually play it, without resorting to using the mouse only in your DAW (yawn!).

In case you don’t already have a controller keyboard, or are looking to upgrade to one with lots of assignable knobs and faders for hands-on control of your DAW and soft synths, here are some great options.

C1) Nektar Impact LX49+

This is the exact controller keyboard I use, so can personally attest to its quality. The drum pads, faders and dials all feel great. USB MIDI Keyboard Controller comes with with Nektar DAW Integration. Recommended.

Price on Amazon (49 key version): https://amzn.to/46hFErt

61 key version: https://amzn.to/46gy6VT

88 key version: https://amzn.to/3Lr2K7d

C2) Nektar Impact LX Mini

Sometimes you only need a compact synth for a portable laptop setup. This has everything and at a great price.

Price on Amazon: https://amzn.to/3EQdkRe

C3) AKAI Professional MPK261

This lovely 61-Key Semi-Weighted USB MIDI Keyboard Controller Including Assignable MPC Controls with 16 Pads, Q-Links, Buttons and Plug and Play Connectivity is a beast. AKAI are a quality brand, and this is a winner.

Price on Amazon: https://amzn.to/45UVlVO

C4) AKAI Professional MPK Mini

Here’s the AKAI in a mini version to carry with your laptop. A 25 Key USB MIDI Keyboard Controller with 8 Backlit Drum Pads, 8 Knobs and Music Production Software Included

Price on Amazon: https://amzn.to/3t5mTcM

C5) Alesis Qmini

Since these analogue synth reissues have tweakable knobs and faders built-in already, you don’t necessarily need knobs and faders on your controller keyboard (although they are still very handy for connecting to Soft Synths). This portable 32 Key USB MIDI Keyboard Controller with velocity sensitive keys is a good value option.

Price on Amazon: https://amzn.to/3PGNzct

C6) Nektar Impact GX61

For a larger keyboard and quality feel, but without paying for assignable knobs and faders, this USB MIDI Controller Keyboard with Nektar DAW Integration is a great option.

Price on Amazon: https://amzn.to/3sUrWwi

Get Tweaking!

You can get several of these reissues for around the same price as one of the original rare beasts. Sure, the reissues might not smell as musty, or have as many stains as an original, but the sound quality is great and all these have been meticulously engineered to be as close to the original as possible. Have fun tweaking your knobs!

Once you’ve made some fresh tunes with your synth, consider sending it to us for professional mixing / mastering https://fatasfunk.com

Posted on

How to Use Mid-Side Processing to Enhance Your Mixes

mid side processing header for mastering and mixing

One of the most powerful and versatile tools in your mixing arsenal is mid-side processing. Mid-side processing allows you to separate the stereo signal of your mix into two components: the mid and the side. The mid component contains the audio that is common to both the left and right channels (Centre Mono), while the side component contains the audio that is different between the left and right channels (the Left and Right).

By processing the mid and side components independently, you can shape the stereo image of your mix in radically different ways, creating more depth, width, and clarity. You can also fix frequency imbalances, remove unwanted resonances, and create more contrast and separation between the elements in your mix. Alternatively you can use it in more subtle ways for mastering to enhance or fix a mix.

In this blog post, we’ll show you what mid-side EQ processing is, how it works, when to use mid side processing, and how you can use it to improve your mixes. We’ll also show you how to use hardware outboard gear to achieve it.

What is Mid-Side Processing?

Mid-side processing is a technique that allows you to separate a stereo signal into two components: mid and side. The mid contains audio common to both channels (mono), while the side contains the differences between the left and right channels.

By splitting the stereo signal into mid and side components, you can apply different EQ, compression or effects settings to each component, and then blend them back together to create a new stereo signal.

Mid-side EQ processing gives you more control over the stereo image of your mix, as you can adjust the frequency balance of the center and the sides of your mix separately. You can shape the stereo image, creating more depth, width, and clarity in a mix. You can fix frequency imbalances, remove resonances, and make elements stand out in the stereo field. Used subtly, mid-side EQ can also enhance a mix for mastering.

How to Use Mid-Side Processing with Software Plug-ins

Using mid-side processing with software plug-ins is very easy and convenient. Many software EQ and compressor plug-ins have built-in mid-side functionality, which allows you to switch between stereo mode, mid mode, and side mode for each EQ band, or compress the different elements separately.

We will use an EQ plugin in this example. Follow these steps:

1. Load a mid side compatible EQ plug-in (like The PSP Neon, Fabfilter or Pro-Q) on your stereo track or bus that you want to process.

2. Activate an EQ band that you want to use for mid-side processing.

3. Switch the mode of the band from stereo to mid or side, depending on which component you want to process.

4. Adjust the frequency, gain, and Q of the band as desired.

5. Repeat steps 2-4 for other bands if needed.

6. Adjust the output gain and bypass switch as needed.

Using software plug-ins for mid-side EQ processing gives you a lot of flexibility and precision. You can easily switch between modes, adjust parameters, and compare results. You can also use different filter shapes and modes for each band, such as low-cut, high-cut, bell, shelf, notch, etc.

How to Use Mid-Side EQ Processing with Hardware Outboard Gear

Using mid-side EQ processing with hardware outboard gear is a bit more complicated but also more rewarding. Hardware outboard gear can give you a unique sound quality and character that software plug-ins cannot replicate. However, most hardware outboard gear does not have built-in mid-side functionality, so you need to use some additional equipment and routing to achieve it.

Here are the steps you need to follow:

  1. You need a plugin that can encode and decode mid-side signals, such as the Voxengo MSED
  2. You need two channels of hardware EQ that you want to use for mid-side processing.
  3. You need an audio interface, mixer or a patchbay that can route the signals from your DAW to your hardware devices and back.
  4. Connect your mid-side encoder plugin to the stereo output of your DAW, to encode the output to M/S mode.
  5. Usually the mid is on the Left output, and the Side is on the Right channel.
  6. Connect the mid (Left) output of your encoder device to the input of one channel of your hardware EQ.
  7. Connect the side (Right) output of your encoder device to the input of another channel of your hardware EQ.
  8. Connect the output of each channel of your hardware EQ back in to to a separate input on your audio interface.
  9. Add another instance of your MS plugin on the stereo input channel of your DAW. Set this one to Decode.
  10. Activate input monitoring on this channel in your DAW, to listen to the audio coming in from the EQ in realtime. This should now be in M/S mode, and you have the ability to EQ the mid and side separately!
  11. Record the MS EQ’d signal in to your DAW. You will usually notice it appears to be overbalanced to the left, however this is actually the mid, not left, and the mid is usually louder than the side! On playback, make sure you have an MS plugin set to Decode, to hear it naturally.

Now you can use your hardware EQs to process the mid and side components of your stereo signal separately, and then blend them back together with your decoder device.

Some examples of how you can use mid-side EQ processing with hardware outboard gear are:

  • You can boost the high frequencies on the side component to create more air and sparkle on your stereo image, while leaving the mid component untouched or slightly attenuated to avoid harshness or sibilance.
  • You can cut the low frequencies on the side component to reduce muddiness and increase mono compatibility, while leaving the low frequencies alone, or boosting them on the mid component to add more punch and weight to your mix.
  • You can notch out unwanted resonances or frequencies on either the mid or the side component, depending on where they are located in your mix, without affecting the other component.
  • You can create more contrast and separation between elements in your mix by boosting or cutting different frequency ranges on the mid and side components, such as making vocals more prominent in the center or making guitars wider on the sides.

Benefits and Drawbacks of Mid-Side EQ Processing

Mid-side EQ processing is a powerful and versatile technique that can help you shape and enhance your stereo image in many ways. However, it also has some potential drawbacks and pitfalls that you should be aware of before using it. Some benefits of mid-side EQ processing are:

  • It gives you more control over the frequency balance and tonal character of your mix, as you can adjust each component independently.
  • It allows you to fix frequency imbalances, remove unwanted resonances, and create more contrast and separation between elements in your mix.
  • It can help you create more depth, width, and clarity in your stereo image, as well as more interest and excitement for the listener.

Some drawbacks of mid-side EQ processing are:

  • It can introduce phase issues and artefacts if not done properly or excessively, especially when using linear-phase EQs or steep filters.
  • It can compromise mono compatibility if you make drastic changes to either component, especially on low frequencies or across a wide frequency range.
  • It can make your mix sound unnatural or exaggerated if you overdo it or use it for everything, instead of using it selectively and subtly.

Conclusion

Mid-side EQ processing is a technique that splits a stereo signal into two components: mid and side. By processing each component separately, you can shape the stereo image of your mix in radically different ways, creating more depth, width, and clarity. You can use mid-side EQ processing with software plug-ins or hardware outboard gear, depending on your preference and budget. However, you should always use it with caution and moderation, as it can also introduce problems and artefacts if not done properly. Mid-side EQ processing is not a magic bullet that will fix all your mixing issues, but rather a tool that can help you enhance what is already good in your mix. Use it wisely and sparingly, and you will be rewarded with better sounding mixes.

We hope this blog post has helped you understand what mid-side EQ processing is, how it works, and how you can use it to improve your mixes.

Here at Fat As Funk, we are extremely experienced in using various M/S techniques in both mixing and mastering, and we use the technique regularly.

Thanks for reading!

Posted on

How Do I Make My Podcast Sound Better? – Podcast Mastering

How to sound good on a podcast – that’s the goal of many aspiring creators.

You create and record valuable content, edit it, and stream it… only to hear that it doesn’t sound as professional compared to some of your peers. There’s so much content available these days, listeners will switch off quickly if your audio isn’t up to scratch.

Podcast mixing and mastering is the answer to your question of “How to fix podcast audio?”

The human voice is what our ears are most attuned to hear, so any minor podcast voice problems are immediately noticeable to any listener, even if they can’t detect what exactly the problem is.

There are a tonne of podcast audio editing tips on the internet, but even if you read it all, crafting your final podcast audio processing to get professional, radio quality results takes a lot of experience and confidence to know what sounds “right”.

Sometimes there is problem noise on the recording (Air Conditioning, computer fan, loud traffic etc.), maybe your voice volume is not consistent, and some words are too quiet to hear. Perhaps your sound FX are jarring in tone compared to your voice over. Maybe your podcast audio levels are not balanced between the voice and music. Or commonly, the whole thing is just too quiet.

How To Improve Podcast Audio Quality

The main things you can do to improve your podcast voice over is to record in a reasonably “dead” room (without a lot of natural reverb), use the best quality condensor microphone you can afford, and record your voice at a good level without distortion. Once you have done these basic steps, the task of getting the final product to sound like a professional podcast is the tricky bit.

Interviews via Zoom and other chat apps are common now, but unfirtunately Zoom podcast audio quality is poor. We can improve your podcast audio quality no matter where your source audio came from. We can also remove wind noise from location interviews.

Using a compressor on your voice to even-out the volume of your voice out is relatively easy – but doing it transparently, so it doesn’t sound “wierd” to the listener is quite a bit tougher. Even a slightly wrong setting on voice compression makes it sound odd to the average listener, and can sometimes even enhance any background noise present on the recording.

The Easiest Way To Improve Your Podcast Audio Quality

You may prefer to spend your time developing your content instead of stressing about this stuff, and leave the podcast audio post production to us.

We can fix podcast audio problems and get your content sounding amazing. It doesn’t cost a fortune either.

We can also edit and work magic on any audio issues in general – enhancing badly recorded audio, breath noise removal, and we can remove unwanted background noise from a recording while leaving your voice in tact and sounding natural.

Get in touch and let us know what’s wrong with your audio, and we will help. We can give you a free demo too, so you can hear how good you could sound with no risk.